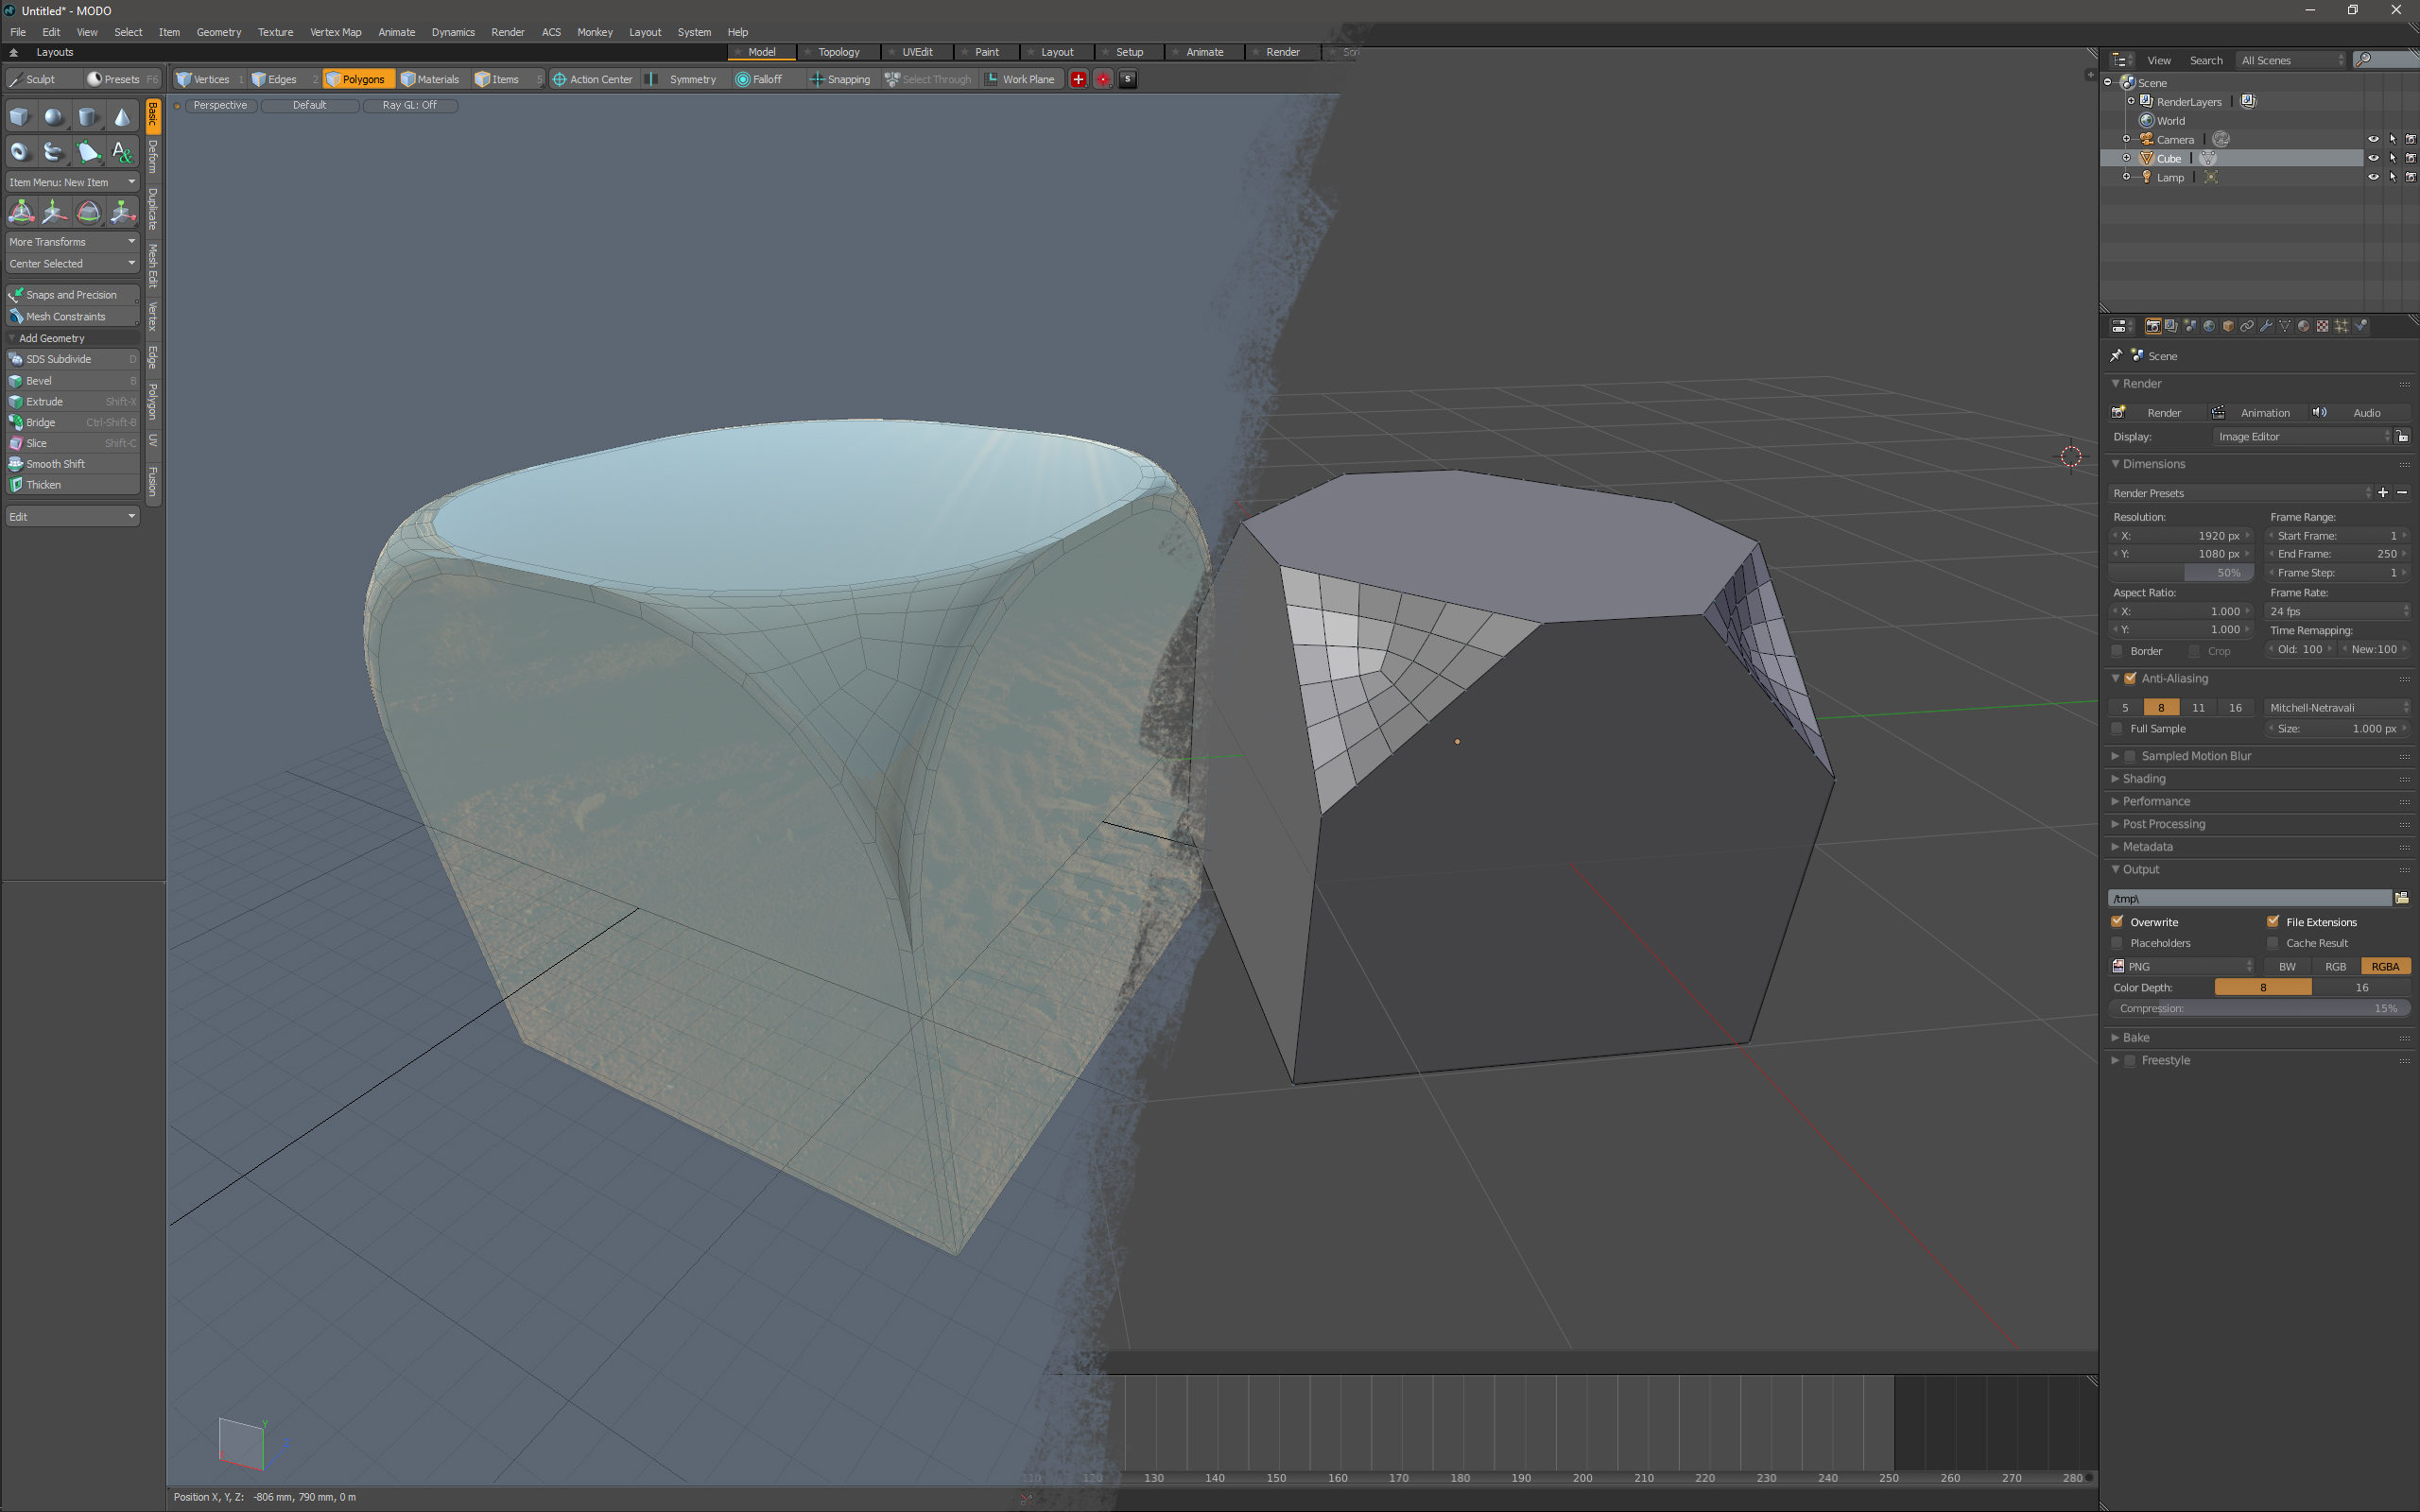
In the process of comparing basic tools and workflows between MODO and Blender I came across the different behaviours between MODO’s and Blender’s Vertex Bevel tools.
In MODO, I get this type of nice rounded effect if I use a Round Level of higher than 0: However, the resulting n-gons surfaces look artifacty unless I then bevel them in to create some ‘support geometry’:
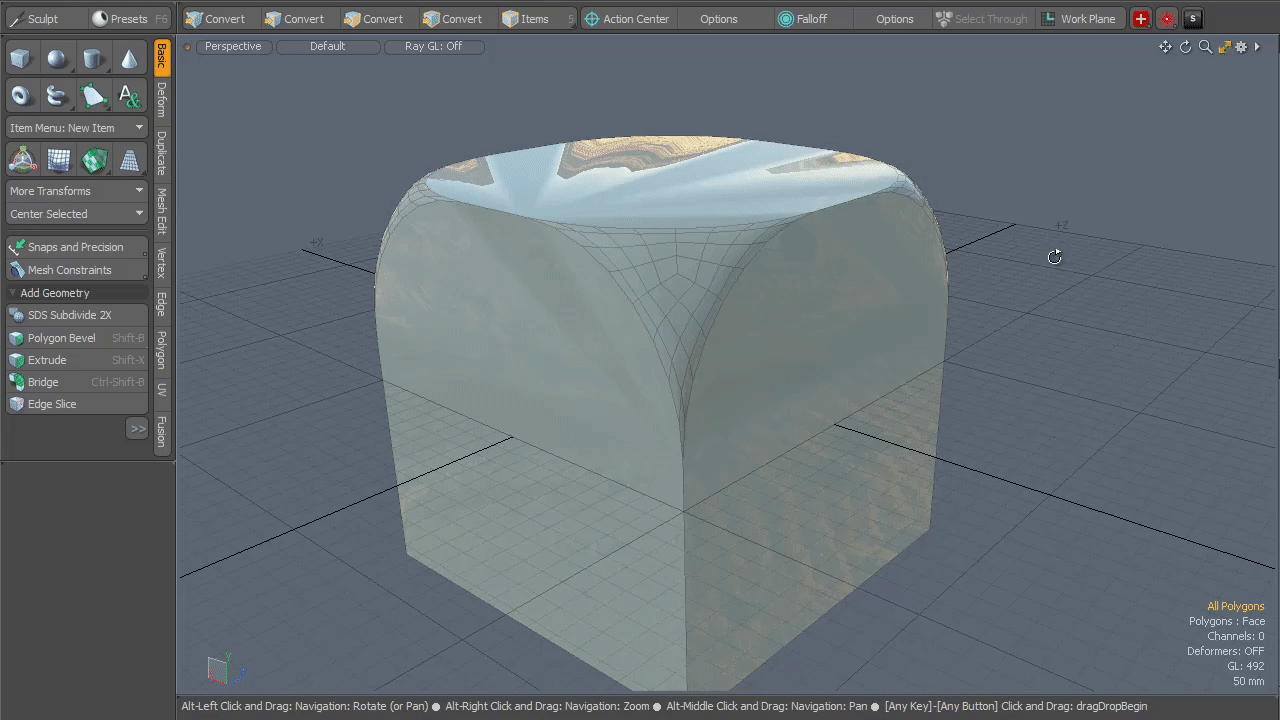 Blender’s works differently. You cannot get the same type of rounding effect on the edges as in MODO but the surfaces are clean. Here’s me using Blender’s Vertex Bevel and importing the resulting mesh into MODO:
 Now on this example, the resulting shape looks just like what you get in MODO with a Round Level of 0. But there is a so-called Profile option in Blender’s Vertex Bevel tool that does make use of the additional subdivisions on the newly created corner surfaces:
 It pushes in/out the newly created surfaces. But the edges between the originally selected vertices remain straight.
Personally I find both tools’ behaviour useful and would like to see either tool include the other’s capabilities. If I had to make a choice I’d say that MODO’s tool is probably more versatile though because the nice edge rounding you can achieve with it is something I need more frequently than the bulging in/out effect that Blender’s Profile option does.
Leave a Reply